From a 2D game to a 3D scene
The short code blocks below isolate one phase at a time. Use the complete source and project downloads to build a running program.
A 3D arena still needs the loop you learned in Star Collector. What changes is what you create and draw: a camera, floor, objects, and effects. Start with an empty arena, then add one effect at a time.
These examples use the current Smile.Simple3D source library and the native DirectX renderer. You need a local SMILE 2.0 repository checkout with its compiler, library, and assets. The downloads target native Windows programs.
Read Types, Classes, and Modules and the library guide first. In this lesson, Arena, Fire, Water, and Earth are import aliases for real modules supplied by Smile.Simple3D. Each effect download uses the shorter alias Vfx for its one selected effect module, with Effect and Sample for the context and frame.
Meet the resource lifecycle
A resource is something the renderer keeps, such as a texture, mesh, or particle pool. Create those resources during startup. While the scene runs, update and draw the resources you already have. Release them when the scene ends.
| Feature | What you keep | How it begins | How it ends |
|---|---|---|---|
| Arena | Arena.State | Arena.Create(...) | Call Arena.Destroy(Stage) |
| Fire | Fire.FireEmitter handle | Fire.Initialize(...), then Fire.StartAtPrecise(...) | Fire.Destroy(Flame), then shared Fire.Shutdown() |
| Water | Water.Context and Water.Frame | Water.Prepare(...) | Call Water.Destroy(WaterEffect) |
| Earth | Earth.Context and Earth.Frame | Earth.Prepare(...) | Call Earth.Destroy(EarthEffect) |
NewThese APIs expose Type values and module functions. You declare them with Dim, then use their real creation function. New belongs to a SMILE Class. A copied Type containing a renderer handle still refers to the same resource; copying it does not create another flame, texture, or GPU pool. Give each live resource one clear owner and one cleanup path.
1. Create the shared arena
ArenaViewport3D combines the standard floor, grid, backgrounds, and camera controls. Your program owns one State value and a base camera describing the starting view.
Import Smile.Simple3D.ArenaViewport3D As Arena
Import Smile.Simple3D.Precision3D As P
Import Smile.Simple3D.Scene3D As Scene

Dim Stage As Arena.State
Dim BaseCamera As P.Camera3D
Dim Ready As Boolean

Game Window "My Arena" Size 1280 By 720

Stage = Arena.Create(1000, 800)
Ready = Stage.Ready
BaseCamera.Position = P.Vector(0.0, 180.0, -500.0)
BaseCamera.Target = P.Vector(0.0, 60.0, 0.0)
BaseCamera.UpDirection = P.Vector(0.0, 1.0, 0.0)
BaseCamera.FovDegrees = 55.0
BaseCamera.NearPlane = 1.0
BaseCamera.FarPlane = 3000.0
This is a startup excerpt. The download includes the loop, renderer check, failure message, and cleanup. The vectors use Double coordinates: X moves across, Y is height, and Z is depth. The camera looks from Position toward Target.
Call Arena.Update(Stage, Key)

Ready = Arena.BeginFrame(Stage, BaseCamera)

If Ready Then
    Ready = Arena.Draw(Stage)
    Ready = Scene.EndScene() And Ready
End If

Show Screen
Read this as: update the controls, open the 3D frame, draw the arena, close the 3D frame, and show the finished picture. Draw your objects and effects after Arena.Draw and before Scene.EndScene. Draw 2D labels after the scene ends and before Show Screen.
| Control | Shared arena behavior |
|---|---|
| F / G | Toggle the floor / grid independently. |
| B | Cycle Black, Green, Purple, Landscape, and Title backgrounds. Startup uses Landscape. |
| Left mouse drag | Pan the view. |
| Middle mouse drag | Orbit around the view's target. |
| Mouse wheel | Zoom smoothly within limits. |
| Right click | Reset the camera controls. |
For a new grid color or spacing, change the options passed to Arena.Create. Keep camera interaction inside the shared arena library instead of copying another application's private camera code.
Prepare the sample projects and assets
The downloaded files are teaching projects that use your local SMILE 2.0 repository. Each project expects its folder to sit two levels below the repository root, such as examples\DocsArena. This makes its ..\..\libraries\Smile.Simple3D reference point to the real library.
- Create
examples\DocsArenain your SMILE 2.0 checkout and save the two arena downloads there. - From the repository root, copy the canonical backgrounds with the existing helper:
.\scripts\copy-arena-assets.ps1 -ProjectDirectory .\examples\DocsArenaThen build and run:
.\artifacts\compiler\smilec.exe --project .\examples\DocsArena\advanced-arena.smileproj --target windows-x64 -o .\examples\DocsArena\bin\DocumentationArena.exe
.\examples\DocsArena\bin\DocumentationArena.exe
The project selects <GraphicsBackend>DirectX</GraphicsBackend>. The compiler publishes the declared assets next to the executable. A source-library reference brings in code; it does not automatically bring in image or model files.
| Feature | Required runtime files | Where the repository keeps the source assets |
|---|---|---|
| Every arena | Assets/Backgrounds/SinStarLandscape.png and SinStarTitleWithLogo.png | The shared copy-arena-assets.ps1 helper copies the canonical Viewer backgrounds. |
| Fire | Assets/Fire/fire-shape-atlas.png, smoke-shape-atlas.png, and ember-shape.png | TechnicalAssets/Generation3/Fire |
| Water | Assets/Water/water-sheet.png and water-drop.png | TechnicalAssets/Generation3/Water |
| Earth | Assets/Earth/EarthRocks.sm3d, its published textures, and earth-dust.png | TechnicalAssets/Generation3/Earth; the model source is earth-rocks.glb and needs the project's model publication step. |
For each effect, create its own folder under examples, such as DocsFire, DocsWater, or DocsEarth. Save the matching source/project pair from the sections below and this helper in that folder:
Open PowerShell in that sample folder and run the helper with the matching effect name:
.\advanced-prepare.ps1 -Effect Fire
..\..\artifacts\compiler\smilec.exe --project .\advanced-fire.smileproj --target windows-x64 -o .\bin\FireDemo.exe
.\bin\FireDemo.exe
For Water or Earth, replace Fire with Water or Earth, use advanced-water.smileproj or advanced-earth.smileproj, and choose a matching output name. The helper copies the canonical backgrounds and the effect's exact source assets. Earth's project converts the GLB rock model through its Model3DAsset declaration and publishes its textures.
Renaming a GLB file to .sm3d does not convert it. Keep the model publication settings and the textures together. These compact demos have no character model or battle rules; they isolate one reusable effect so you can understand its lifecycle.
2. Create a fire emitter
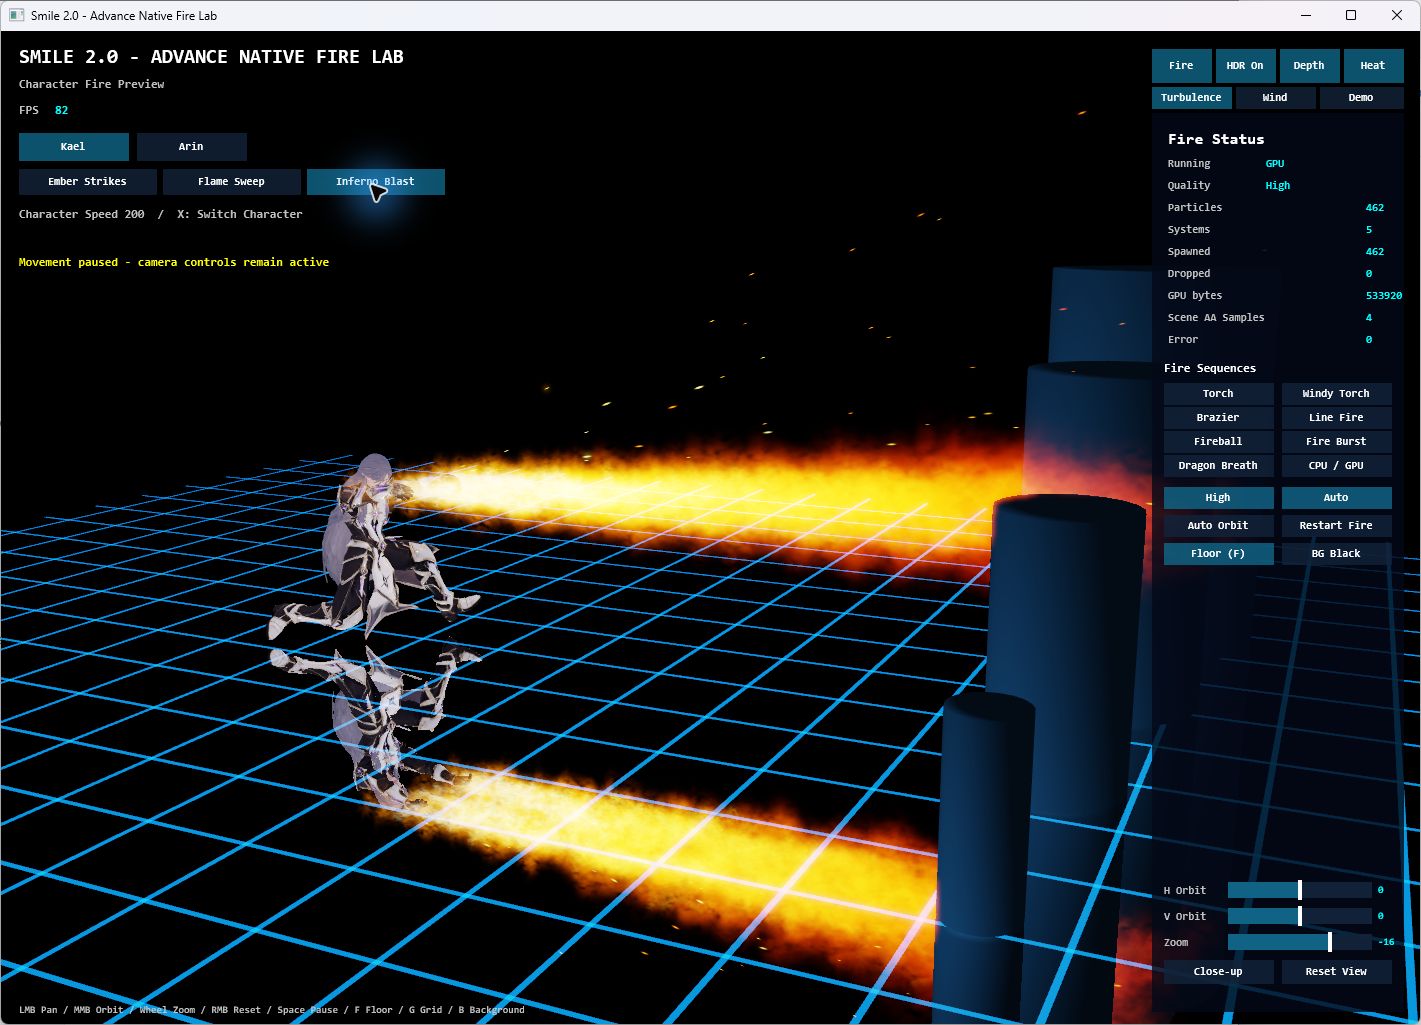
An emitter is a source that keeps producing particles. A torch is a useful first example because it can stay in one place while its fire, smoke, and embers change over time.
Import Smile.Simple3D.FireEmitter3D As Fire
Import Smile.Simple3D.Precision3D As P

Dim Flame As Fire.FireEmitter
Dim Ready As Boolean

' Startup: load the shared fire resources once.
Ready = Fire.Initialize("Assets/Fire")

If Ready Then
    Flame = Fire.StartAtPrecise("TorchFire", P.Vector(0.0, 20.0, 0.0), 12345,
        Fire.QUALITY_MEDIUM, Fire.SIMULATION_AUTO, 20)
    Ready = Flame.Slot <> 0
End If
"TorchFire" selects an existing preset. The position places the source in the world. The seed selects its repeatable random sequence; quality controls the effect budget, and automatic simulation selects an available backend. The final 20 is the source radius in world units.
' Update once for the whole fire system each frame.
Call Fire.Update(Elapsed)

' During the open 3D scene, draw this emitter.
Ready = Fire.Draw(Flame) And Ready
If you have three emitters, call Fire.Update(Elapsed) once and draw each emitter once. Updating the shared system three times would advance every emitter three times. To move an existing flame, use Fire.SetPositionPrecise; do not start a replacement emitter every frame.
' After the loop: release this emitter, then shared fire resources.
Ready = Fire.Destroy(Flame)

Call Fire.Shutdown()Move the torch's initial X position from 0.0 to 80.0. Then try a second emitter with its own handle and seed, remembering that the shared update still runs only once.
3. Give water an effect context and a frame
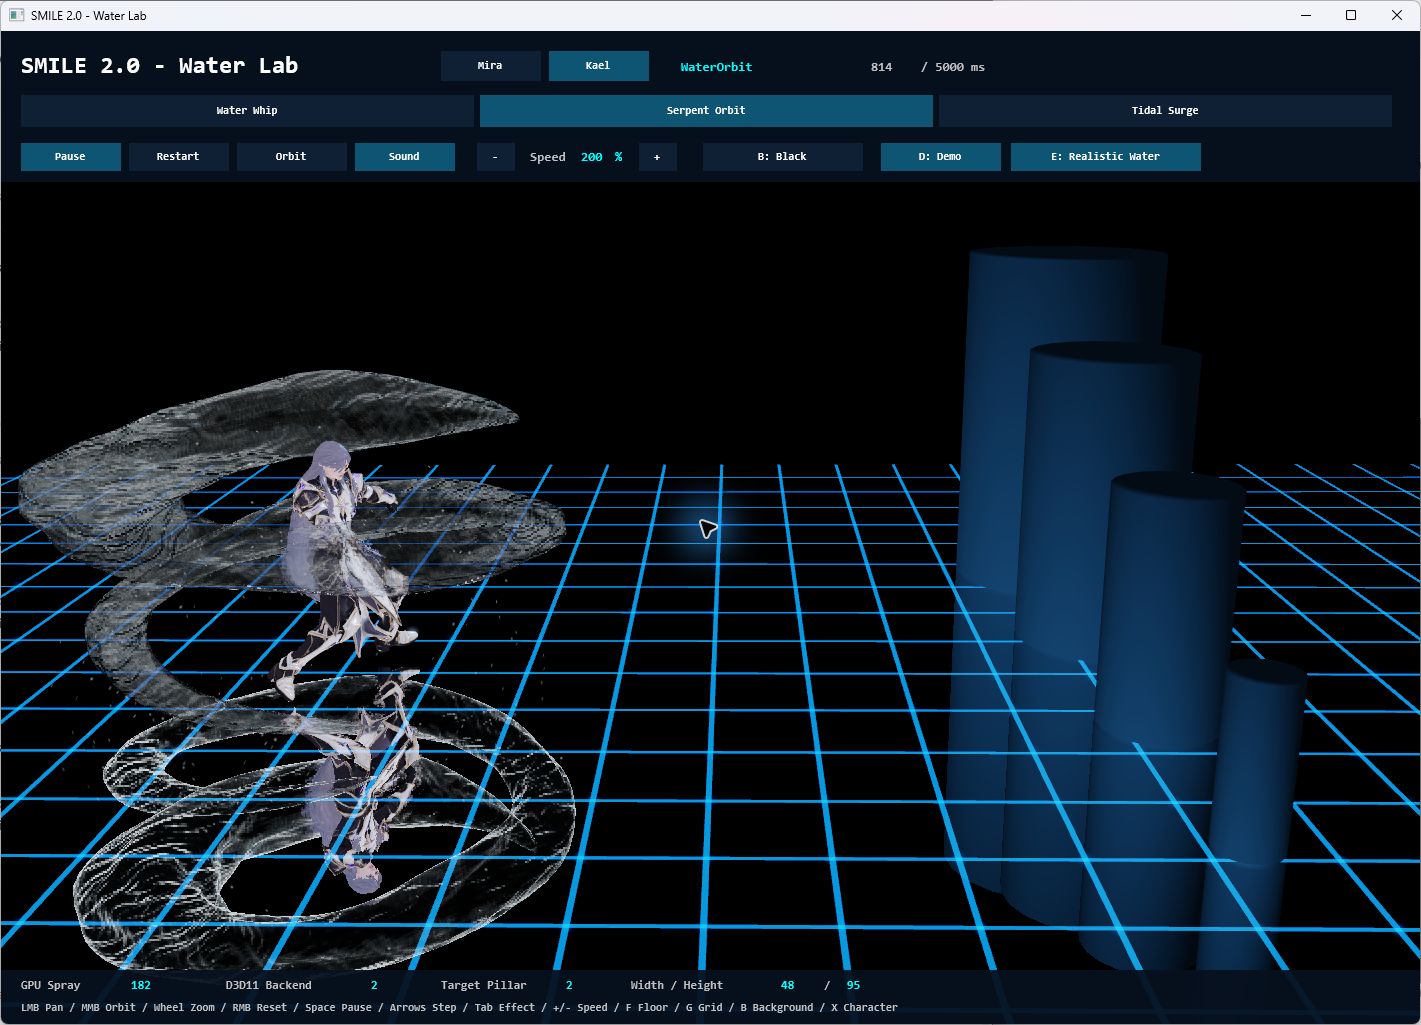
A Water.Context owns the reusable rendering resources. A Water.Frame describes what the effect should do now: its mode, time, strength, position, and target. Keep the context for the scene; update the frame as the cast progresses.
Import Smile.Simple3D.WaterVfx3D As Water
Import Smile.Simple3D.Precision3D As P

Dim WaterEffect As Water.Context
Dim WaterFrame As Water.Frame
Dim Ready As Boolean

' Startup: allocate the water resources once.
Ready = Water.Prepare(WaterEffect, "Assets/Water")
For a simple traveling water effect, build a frame like this inside your update phase. Here CastTime is your scene's current cast time in milliseconds.
WaterFrame.Mode = Water.WATER_BALL
WaterFrame.Time = CastTime
WaterFrame.Progress = ToDouble(CastTime) / 4000.0
WaterFrame.Strength = 1.0
WaterFrame.FlowScale = 1.0
WaterFrame.Origin = P.Vector(-160.0, 70.0, 0.0)
WaterFrame.Target = P.Vector(160.0, 65.0, 0.0)
WaterFrame.Realistic = True
Ready = Water.Update(WaterEffect, WaterFrame)
Progress is a Double from 0.0 to 1.0. At 2,000 milliseconds of a 4,000-millisecond cast it is 0.5, halfway through. ToDouble matters: a Number division would discard the fractional part. Clamp or restart your cast clock at its duration.
' During the open 3D scene:
Call Water.Draw(WaterEffect)

' After the main loop:
Call Water.Destroy(WaterEffect)
The module supplies several modes, including HEAL, SHIELD, TORRENT, WATER_BALL, WAVE, and WATER_BEND. Different modes use different frame fields; read the official module and Lab before switching a complex effect. For target wrapping, the frame also accepts target bounds.
Water does not decide whose turn it is, spend Magic Points, select an enemy, or animate a character's arms. Your game makes those decisions and supplies the frame. That separation lets a different character reuse the same water effect.
4. Animate rocks and keep the dust alive
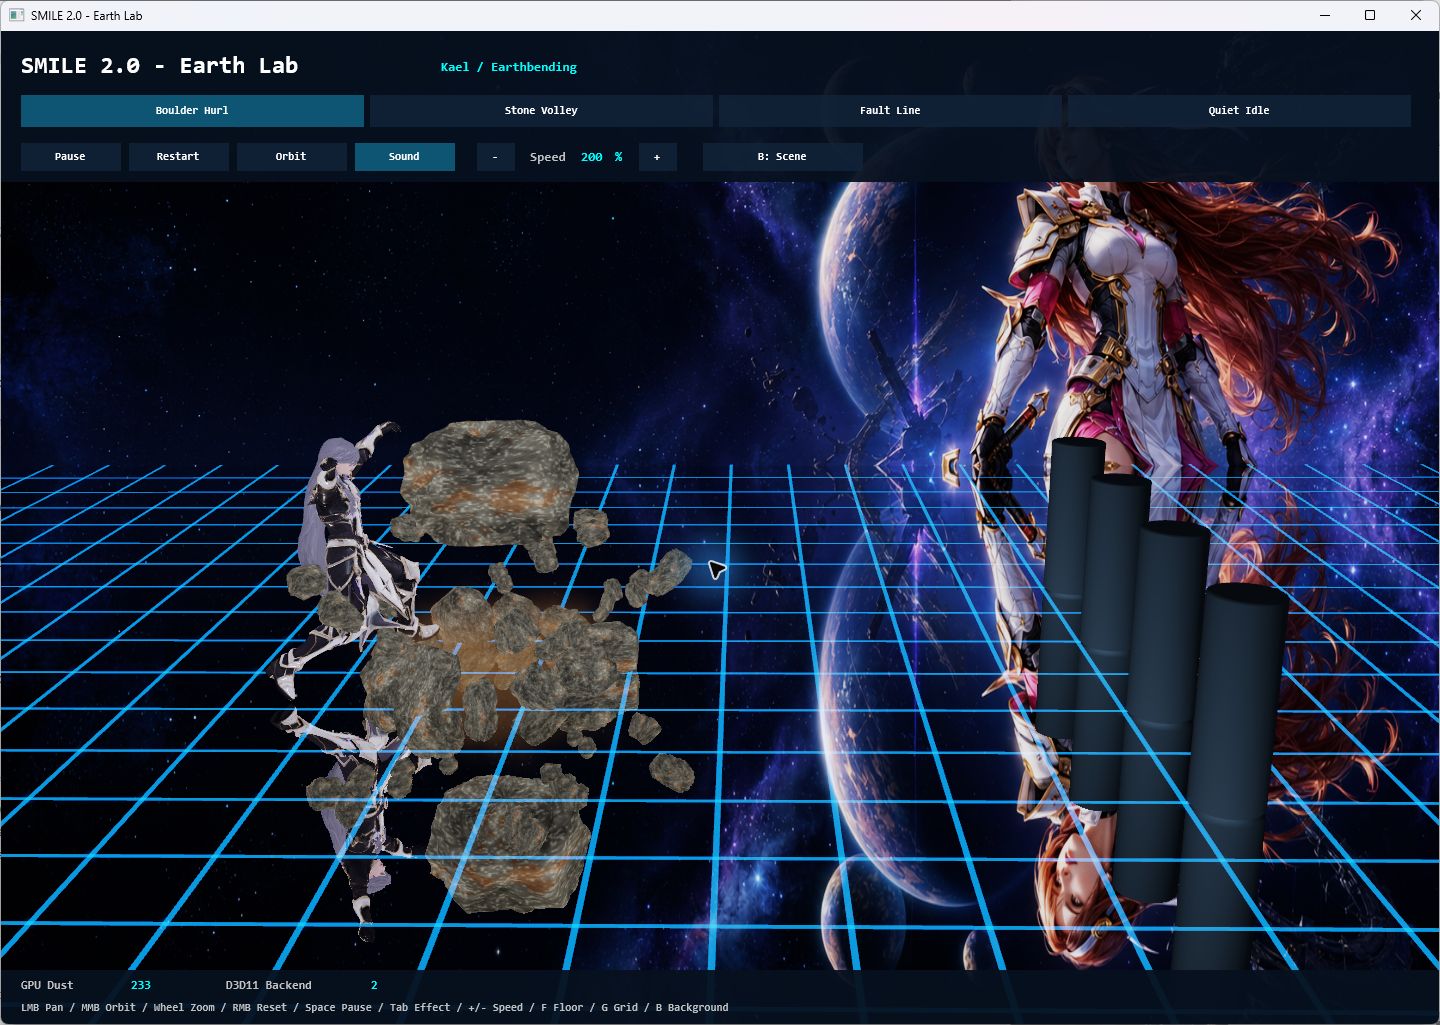
Earth uses the same context-and-frame idea, with reusable rock models and a dust pool. Its frame has one extra timing detail worth learning: Time locates the cast, while Elapsed says how much playback time advanced since the last update.
Import Smile.Simple3D.EarthVfx3D As Earth
Import Smile.Simple3D.Precision3D As P

Dim EarthEffect As Earth.Context
Dim EarthFrame As Earth.Frame
Dim Ready As Boolean

' Startup: load the prepared rock model and dust resources once.
Ready = Earth.Prepare(EarthEffect, "Assets/Earth")
EarthFrame.Mode = Earth.HURL
EarthFrame.Time = CastTime
EarthFrame.Elapsed = Elapsed
EarthFrame.Progress = ToDouble(CastTime) / 4000.0
EarthFrame.Scale = 1.0
EarthFrame.Origin = P.Vector(-160.0, 0.0, 0.0)
EarthFrame.Target = P.Vector(160.0, 50.0, 0.0)
Ready = Earth.Update(EarthEffect, EarthFrame)The current modes are HURL, VOLLEY, and SLAM. The frame's scale, origin, and target place the authored effect in your scene.
' During the open 3D scene:
Call Earth.Draw(EarthEffect)

' After the main loop:
Call Earth.Destroy(EarthEffect)
Dust can keep fading after a rock reaches its target. At the end of a cast, continue giving the effect elapsed playback time so that tail can finish. When playback is paused, keep the cast time fixed and set Elapsed to zero. Do not destroy and recreate the entire context just to repeat a cast.
In the downloaded Earth sample, change Sample.Mode = Vfx.HURL to Vfx.VOLLEY and compare the motion. For a closer inspection, open the full Earth Lab and use its Pause control at the impact. Watch how the rock motion and dust timing serve different jobs.
Bring the scene together
Use this order when adding an effect to your arena. The download examples provide the actual declarations, setup, and shutdown around it.
- Read the key and calculate elapsed milliseconds.
- Update the shared arena controls.
- Advance your own cast clock and fill the effect's frame.
- Update each water/earth context, or update the shared fire system once.
- Begin the arena frame and draw the floor, grid, objects, and effects.
- End the 3D scene, draw any 2D labels, and call
Show Screen.
SMILE's And short-circuits. The expression Ready = Scene.EndScene() And Ready calls EndScene first and preserves an earlier failure. Reversing those operands could skip cleanup when Ready is already false. The samples only end scenes whose begin operation succeeded.
| Symptom | First check |
|---|---|
| The arena reports it could not start. | Use the native DirectX project and confirm both declared background images were published next to the executable. |
| An effect's preparation returns false. | Check the asset folder, filenames, and readiness/error fields before entering normal playback. Earth needs a prepared SM3D model with its textures. |
| Fire gets faster when you add more torches. | Call the shared Fire.Update once per frame, outside any emitter loop. |
| An effect never advances. | Check that cast time changes, Progress uses Double arithmetic, and update is called each frame. |
| Resources run out after several rounds. | Reuse contexts through a round, destroy them on scene exit, and do not overwrite a live handle with another creation result. |
| The spell looks correct but causes no damage. | That is expected until your game supplies combat rules. Visual particles do not own gameplay. |
For a finished actor-driven example, explore the Fire Lab, Water Lab, and Earth Lab. Their scenes add characters, target selection, animation timing, sound, and inspection controls around these reusable modules.